Basic Recipe for 1lb of Lentils in an Instant Pot (Plain)
A starting point for cooking green, black, French, beluga, etc. lentils in an Instant Pot by the pound. No seasonings, just the approximate amounts of lentils, water, and time.
Servings: 8 Servings
Equipment
- Instant Pot
Ingredients
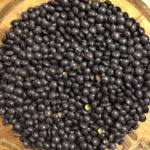
- 1 lb Lentils This recipe is only for lentils with the hull intact: green, brown, black, French, beluga, etc. lentils. Red lentils do not have a hull and will likely be overcooked.
- 4-4.5 cups Water An approximate starting point, adjust to your wishes as you experiment.
Instructions
- Carefully sort and rinse lentils to check for any small bits of debris or even tiny stones. (Yes, I've seen that before! YIKES!)
- Drain the lentils and place them in the instant pot
- Add water, be sure that the lentils are covered.
- Set the Instant Pot for 7 minutes in manual mode. Again, this is my preference, if you want them more mushy, cook for 8-9 minutes. If you like them crunchy (!!) then 6 minutes might do for you. Again, your mileage may vary, but experimenting with this is time well spent.
- You might see "natural pressure release" written in other recipes online. All this means is to leave the Instant Pot alone for a set period of time before opening the pressure value to release whatever remaining pressure there may be. After about 15 minutes there likely won't be much if any, but still always open the valve away from people and keep your hands, face, etc. clear. After you have opened the valve and there's no sounds, steam, etc. coming out, carefully open the Instant Pot lid - again away from you just in case.
- Give them a quick stir, if you cook them like I do,the tip top layer will be a little crunchy. Let them sit a few minutes and assess if you like the results. Make notes for next time if they're a bit mushy. If they're too crunchy, put the lid back on and let them hang out in there a little longer.
- At this point you may want to add some seasonings - I love them with just mineral salt, pepper, and a splash of olive oil and vinegar. You can also let them cool a bit before dishing into meal prep containers or your preferred containers for refrigerated food storage.